
Page 14 - Guide Artisteer
P. 14
14
page
How to use the Artisteer.net Administration Panel
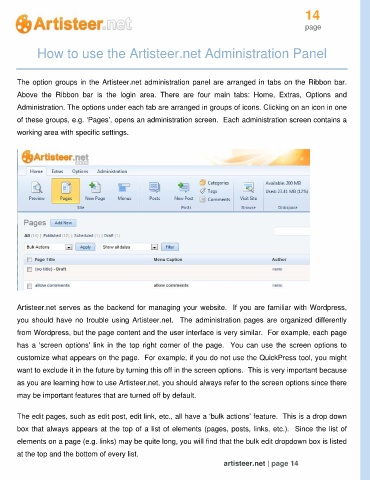
The option groups in the Artisteer.net administration panel are arranged in tabs on the Ribbon bar.
Above the Ribbon bar is the login area. There are four main tabs: Home, Extras, Options and
Administration. The options under each tab are arranged in groups of icons. Clicking on an icon in one
of these groups, e.g. ‘Pages’, opens an administration screen. Each administration screen contains a
working area with specific settings.
Artisteer.net serves as the backend for managing your website. If you are familiar with Wordpress,
you should have no trouble using Artisteer.net. The administration pages are organized differently
from Wordpress, but the page content and the user interface is very similar. For example, each page
has a 'screen options' link in the top right corner of the page. You can use the screen options to
customize what appears on the page. For example, if you do not use the QuickPress tool, you might
want to exclude it in the future by turning this off in the screen options. This is very important because
as you are learning how to use Artisteer.net, you should always refer to the screen options since there
may be important features that are turned off by default.
The edit pages, such as edit post, edit link, etc., all have a ‘bulk actions’ feature. This is a drop down
box that always appears at the top of a list of elements (pages, posts, links, etc.). Since the list of
elements on a page (e.g. links) may be quite long, you will find that the bulk edit dropdown box is listed
at the top and the bottom of every list.
artisteer.net | page 14